Rainscreen Moisture Management: Drainage, Drying & Air-Barrier Coordination
 Rainscreen

Rainscreen moisture management works best when the cladding and attachment system are developed around the wall’s drainage, drying, and air/water-control strategy. For teams evaluating rainscreen facade systems for commercial buildings, that means understanding how panel geometry, cavity continuity, insulation, subframing, flashing, and control layers interact at the conditions that matter most.
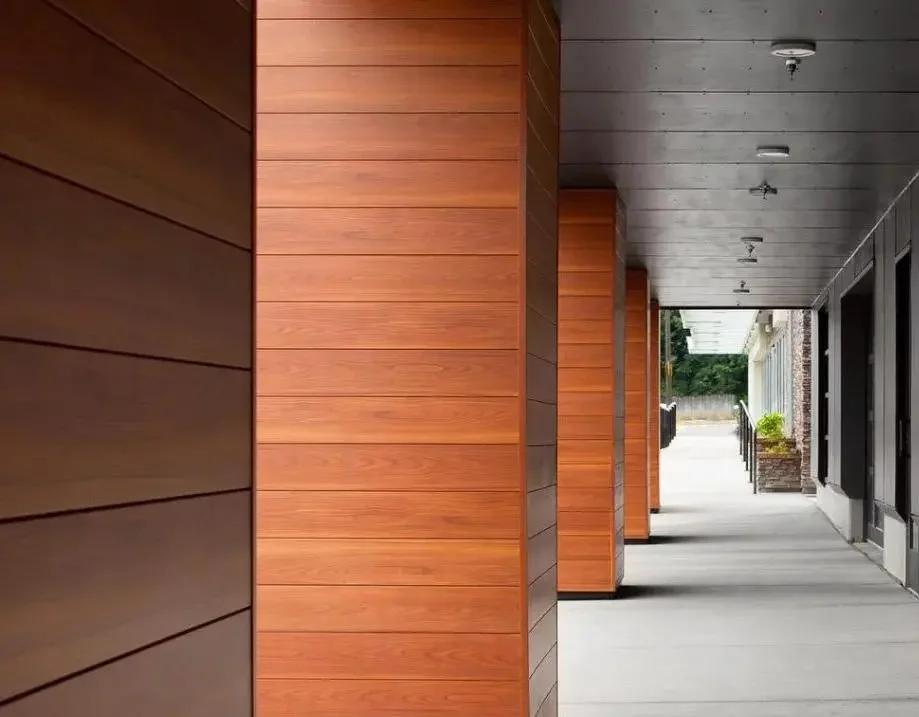
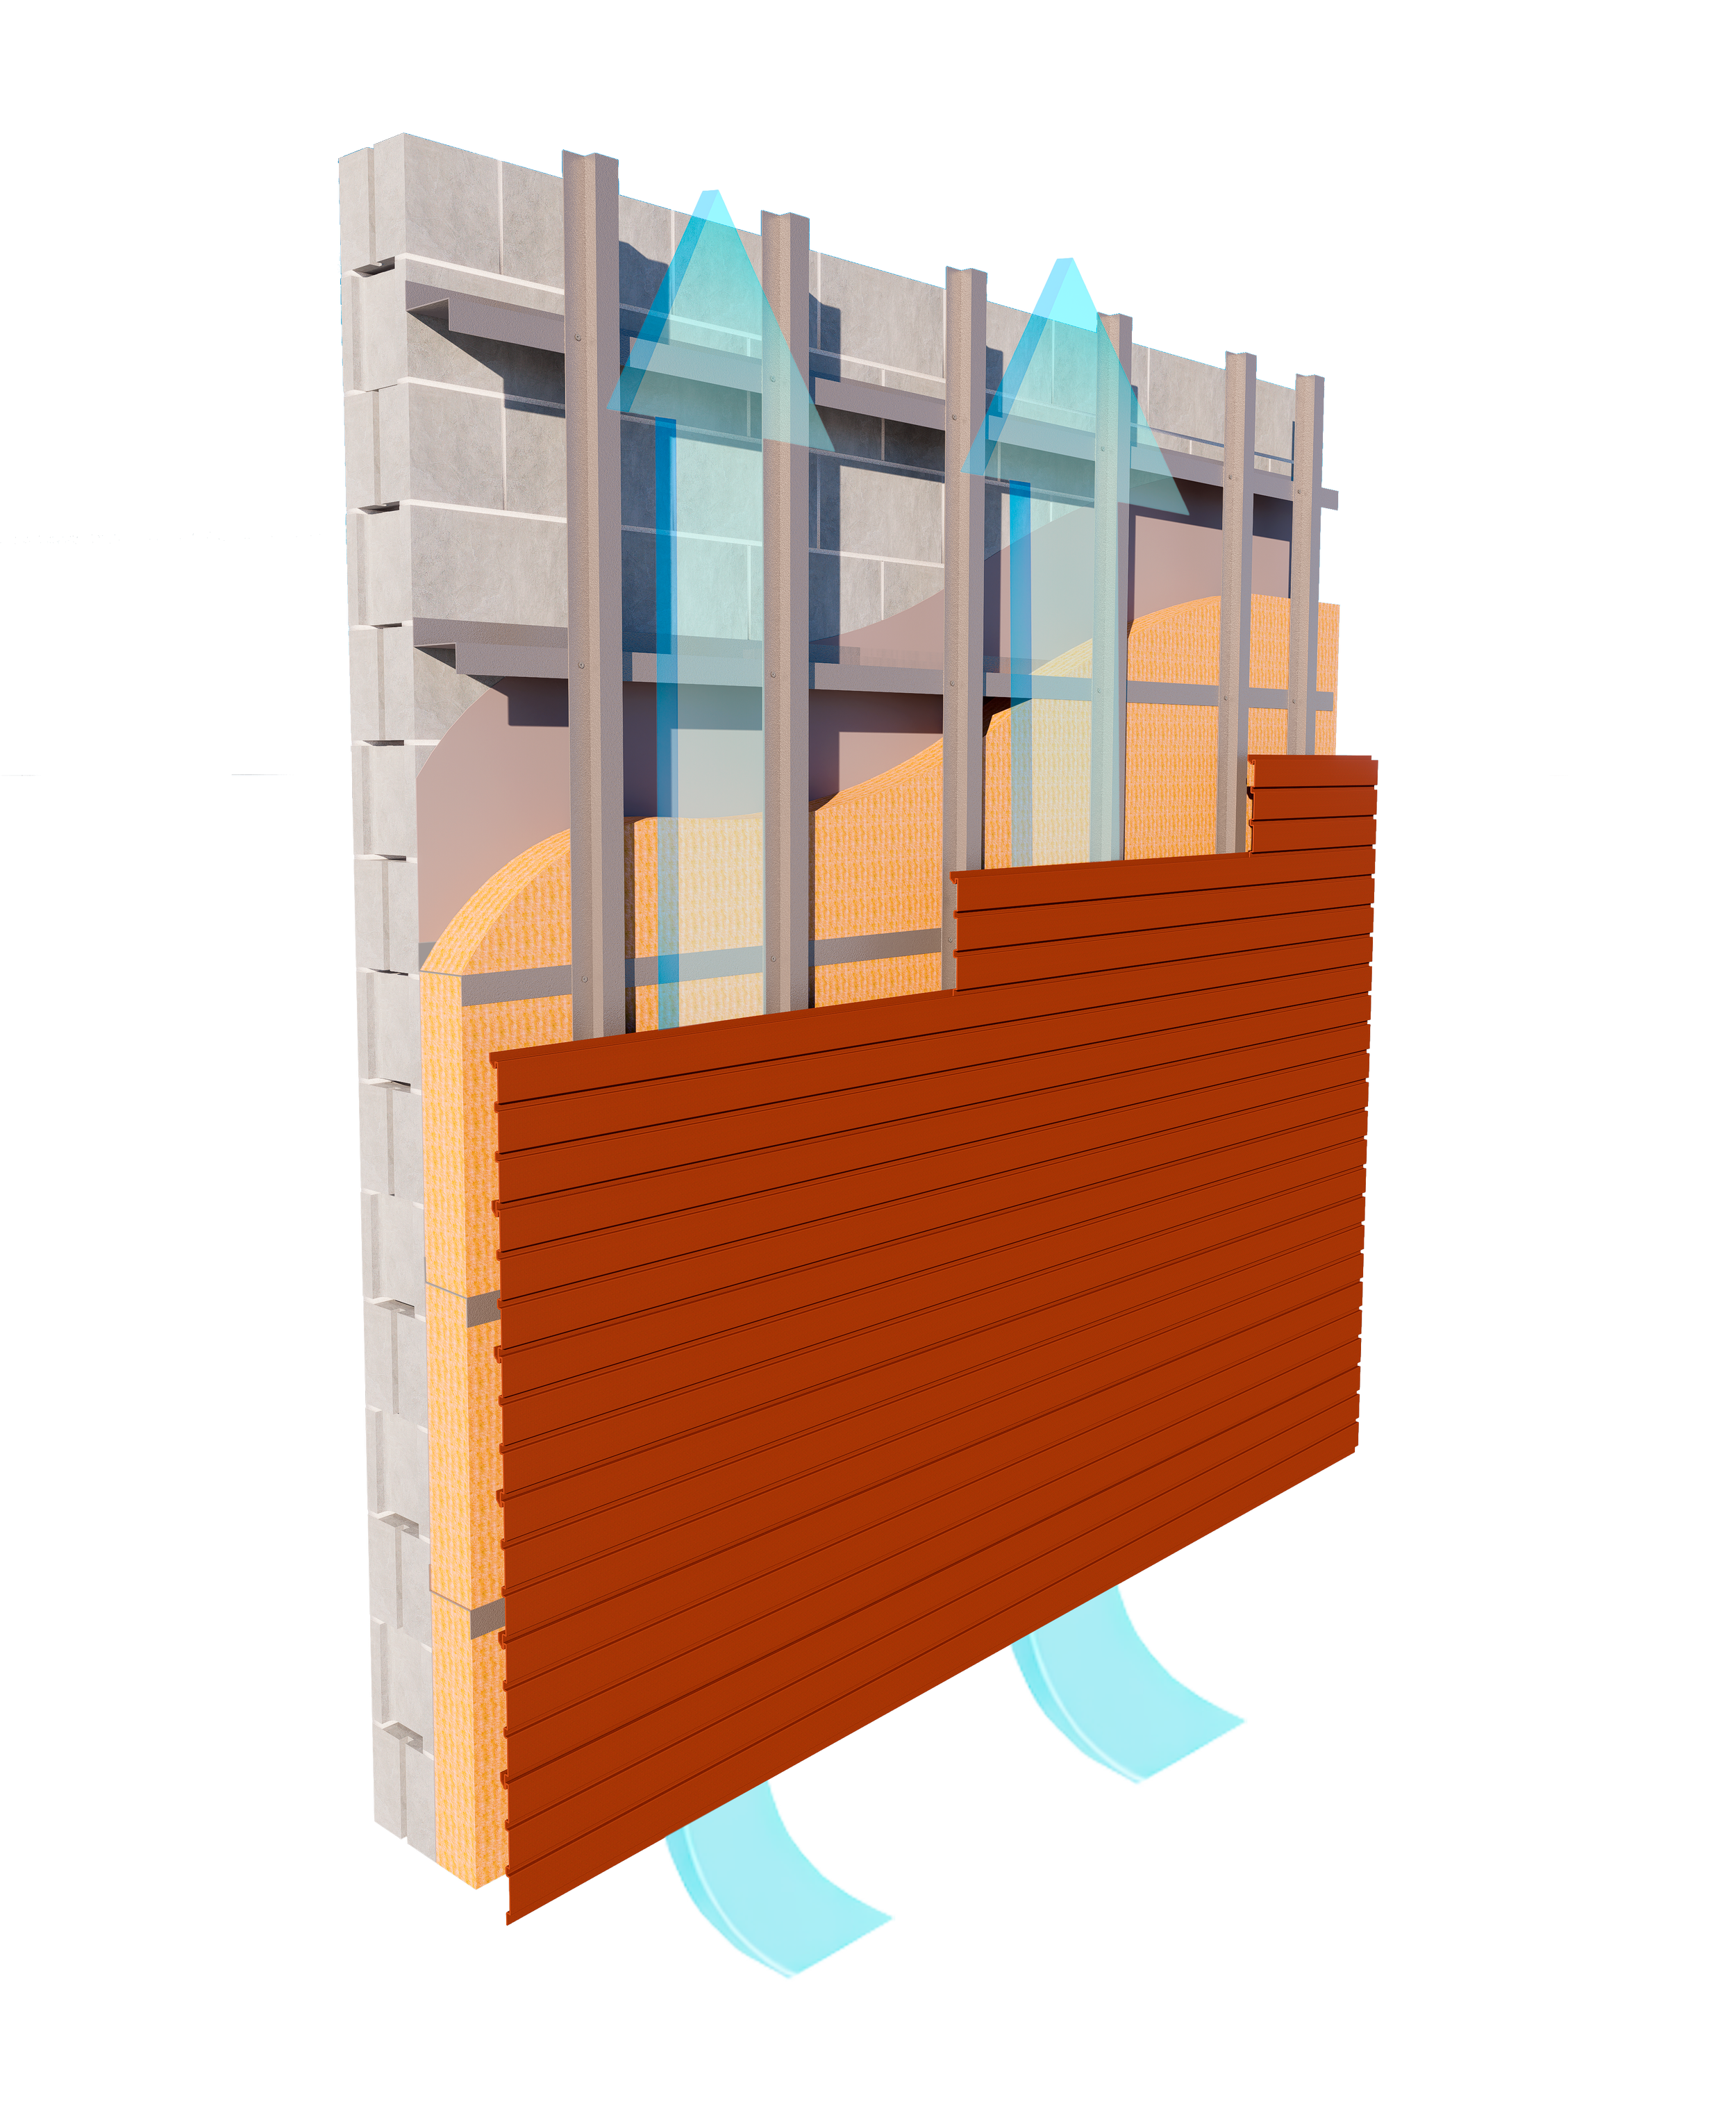
A rainscreen is expected to shed most rain at the exterior while allowing incidental water to drain and residual moisture to dry. Maintaining a ventilated rainscreen cavity for continuous drainage and ventilation helps preserve those paths behind the cladding, while the broader wall design must also protect control-layer continuity at openings, penetrations, and transitions. aPlank supports that process with extruded aluminum cladding and aFrame subframing that can be configured around project-specific wall conditions.
Moisture Management Depends on System Coordination
For active facade projects, the most important moisture-management decisions often occur at interfaces. The cladding, cavity, WRB, air barrier, insulation, flashing, and attachment points each perform a different function, but interruptions between them can affect how water moves through and out of the assembly. WBDG moisture-management guidance likewise emphasizes both drainage to the exterior and drying of accumulated moisture.
aPlank does not replace the project’s WRB, air barrier, or flashing design. Its role is to provide cladding and attachment options that can fit within the intended wall build-up while preserving the space and access required for drainage, insulation, and control-layer detailing.

Review Rainscreen Product Options for Your Wall Assembly
Share substrate, insulation, system-depth, and cladding requirements with aPlank for product guidance on panel and aFrame options.
Connect with our team →How aPlank Can Support the Project’s Drainage Strategy
Drainage paths must remain clear at bases, openings, horizontal transitions, and terminations. Panel geometry and support locations therefore matter because they establish what sits in front of those conditions and how much room remains for flashing, drainage, and cavity continuity.
aPlank’s extruded aluminum cladding can be paired with project-specific subframing layouts so the rainscreen can respond to changing panel directions, wall depths, openings, and substrate conditions before fabrication. The goal is not to prescribe one universal drainage detail, but to give the project team enough flexibility to carry its intended drainage strategy through the cladding scope.
“Drainage performance is often determined at the interruptions: openings, transitions, terminations, and penetrations.”
— Rainscreen detailing principleCoordinating Subframing with Insulation and Control Layers
Subframing directly affects the space available for insulation, drainage, and the intended cavity behind the cladding. Its projection, spacing, and installation therefore have practical consequences for the wall build-up.
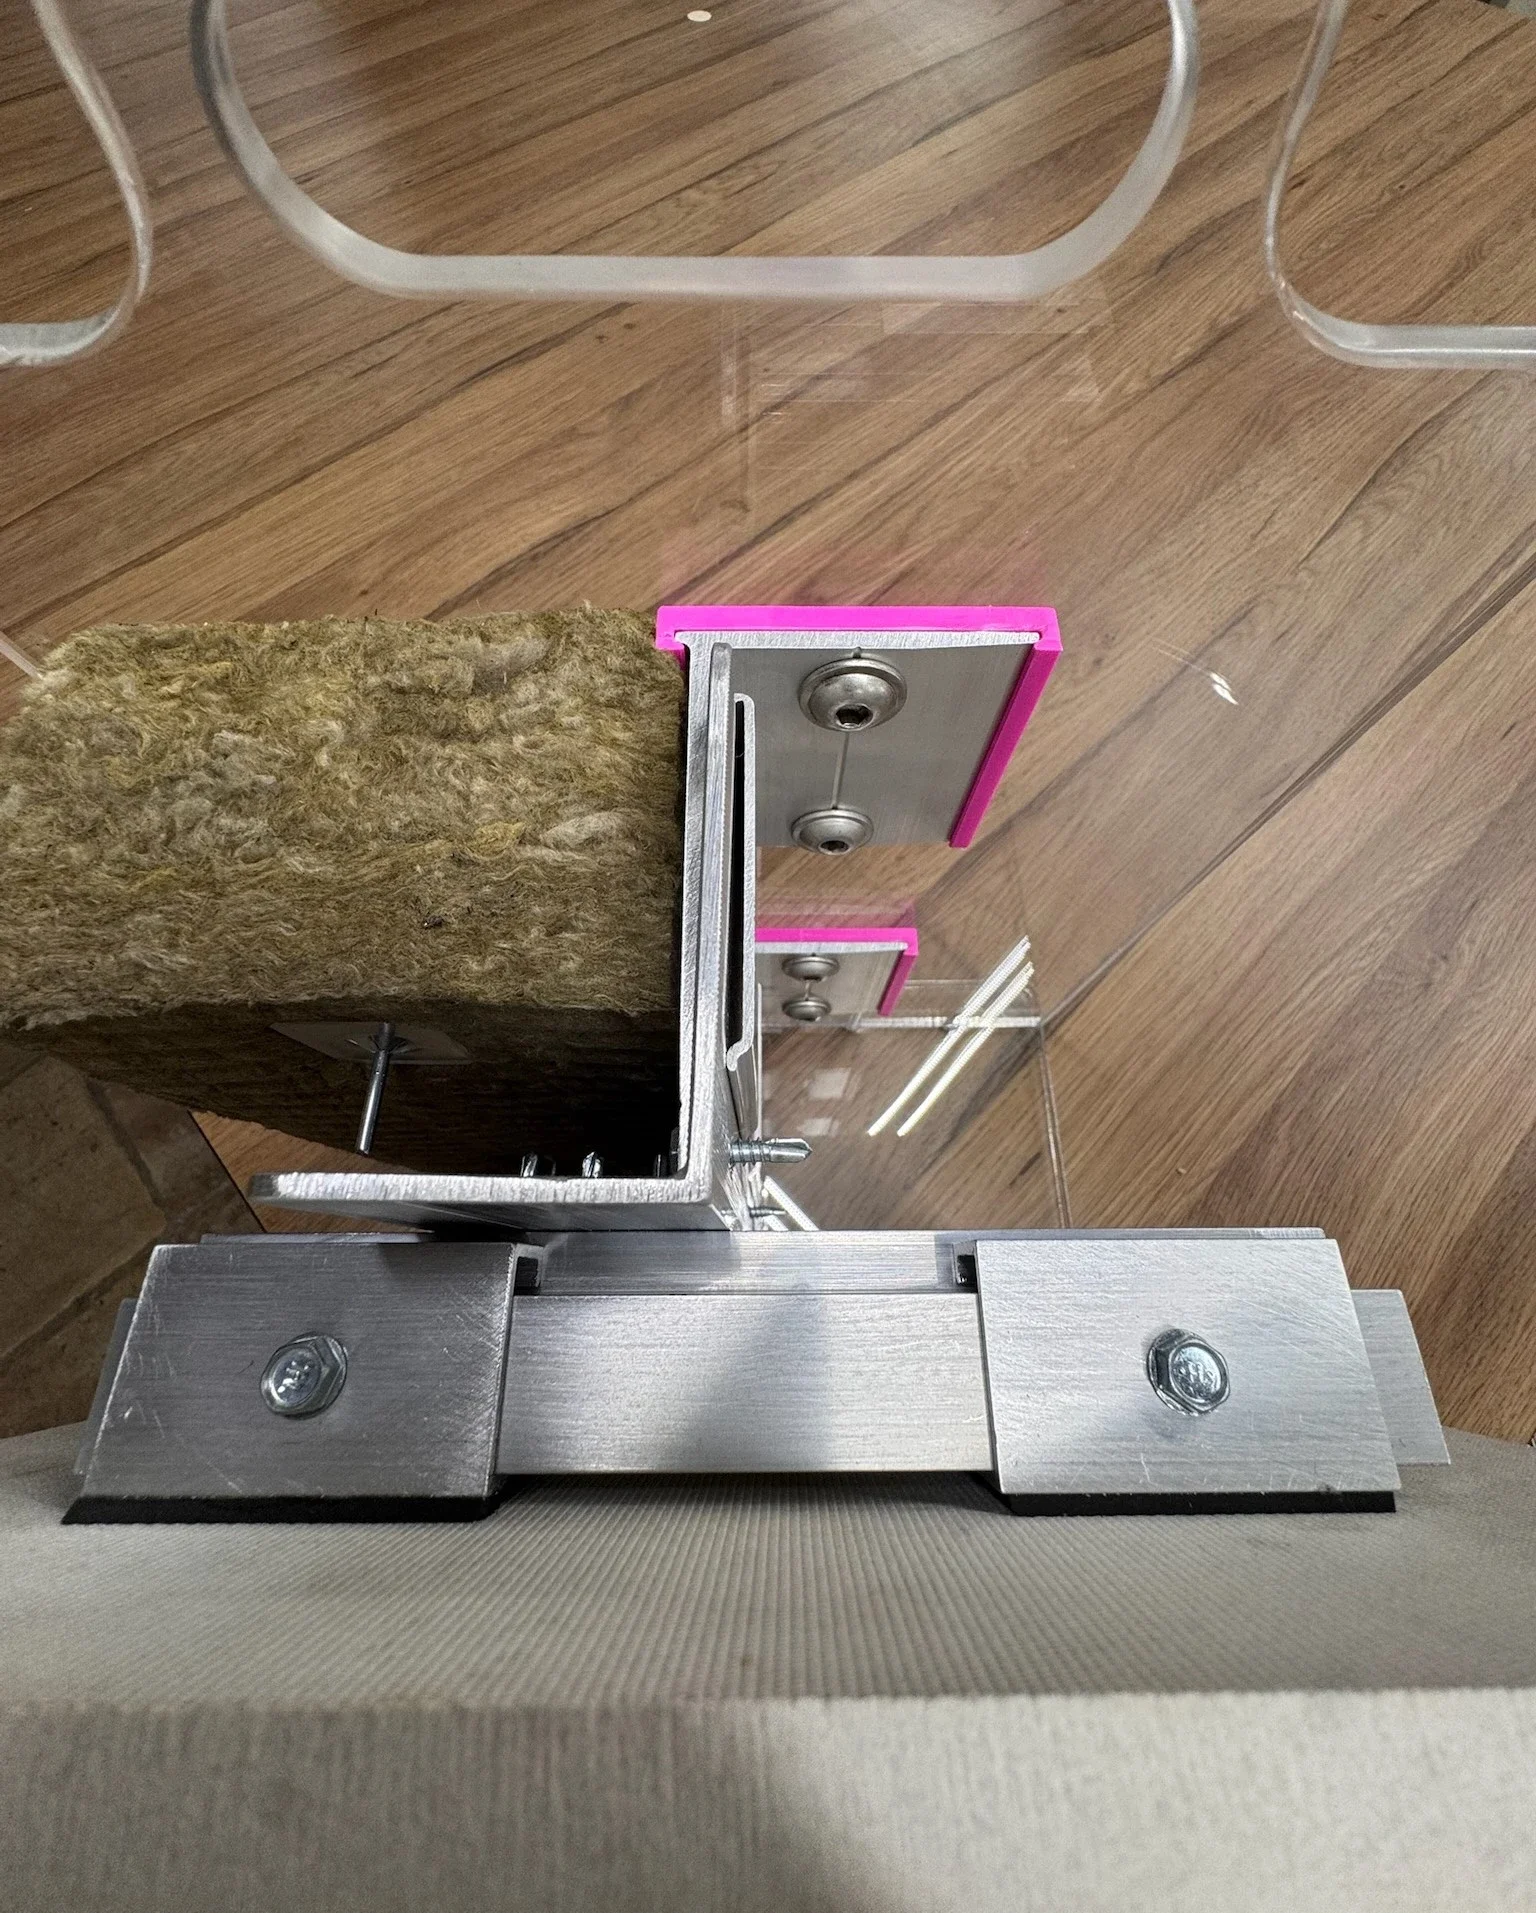
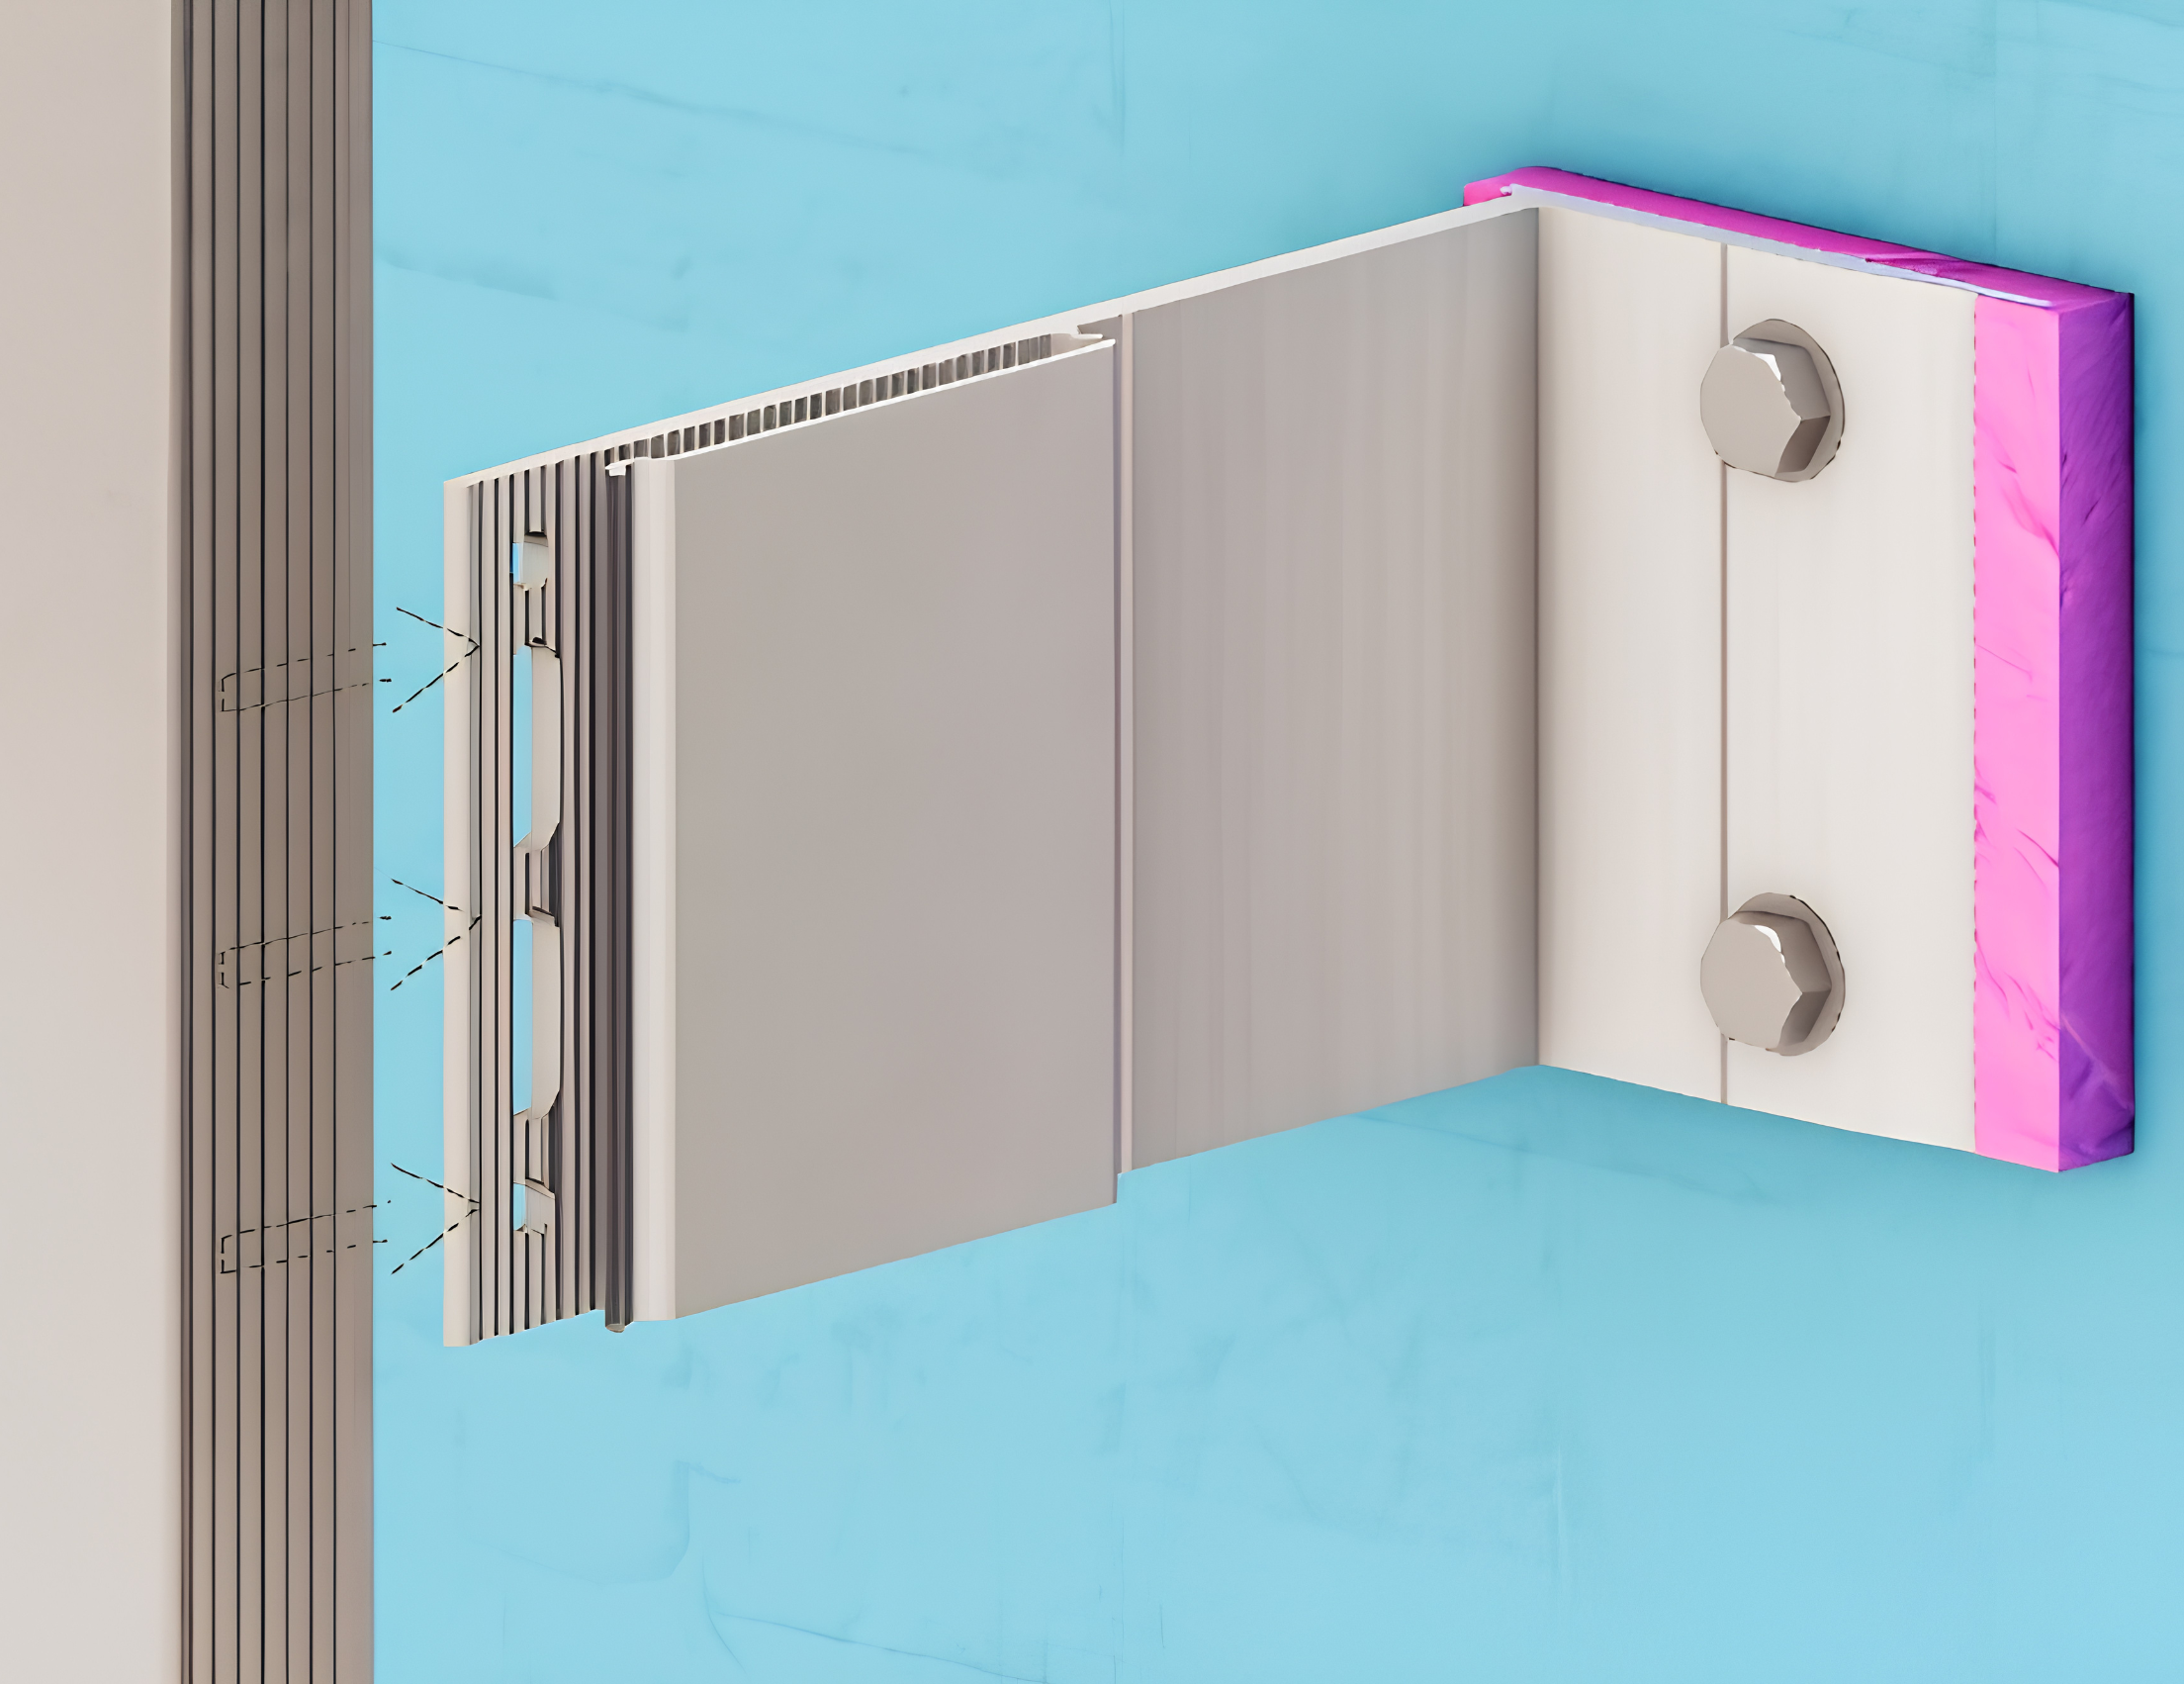
aFrame is aPlank’s adjustable thermally broken subframing system. V4 through V10 bracket options accommodate different system depths, while bracket locations and primary fasteners are selected according to the approved shop drawings and wall type. aFrame guidance also calls for insulation to be tightly fitted around brackets and secured so it cannot obstruct the ventilated cavity.
These characteristics allow the attachment plane to respond to different wall depths and substrate conditions while preserving the intended space behind the cladding. The aFrame thermally broken subframing integration guide provides additional detail on bracket selection, attachment, cavity continuity, and insulation relationships.
| Project input | Why it matters for product guidance |
|---|---|
| Wall substrate | Informs suitable attachment and primary-fastener considerations. |
| Insulation thickness and system depth | Helps identify appropriate aFrame bracket depth options. |
| Loading conditions | Supports selection of attachment components suited to project demands. |
| Cladding profile and orientation | Helps evaluate panel and subframing options, including profile customization where useful. |
With this information, aPlank can provide more relevant product guidance, help identify suitable aFrame options, and collaborate on profile customization where the project calls for a more specific cladding solution.
Addressing the Conditions Where Moisture Problems Usually Develop
Openings, penetrations, parapets, bases, soffits, and changes in material or substrate deserve particular attention because several parts of the wall assembly meet there. WBDG air-barrier guidance also stresses continuity at penetrations and connections to windows, doors, roofs, foundations, and joints.
For aPlank, these conditions affect how panel edges, rails, brackets, trims, and terminations should be laid out relative to the project’s flashing and control layers. Reviewing them before release can identify conflicts that would otherwise reach fabrication or the field.
Openings
Window and door interfaces can influence support locations, panel edges, and available space for flashing.
Transitions
Wall returns and substrate changes can require local adjustments even when the typical wall condition remains unchanged.
Terminations and penetrations
These conditions should preserve access for control-layer detailing and the intended route for drainage.

Corners and transitions concentrate several facade interfaces in a small area, making their relationship to the wall build-up especially important.
Carry Moisture-Management Intent Through the Rainscreen Scope
Good rainscreen moisture management is reflected in the details: incidental water has a route out, residual moisture can dry, insulation stays clear of the cavity, and attachment conditions do not obstruct the intended wall build-up.
By combining extruded aluminum cladding with adjustable aFrame subframing, aPlank can support project teams with product guidance that responds to those requirements, from early system selection through shop drawings and fabrication.
Rainscreen Moisture Management: Common Questions
Does a rainscreen cladding system need to be completely watertight?
No. The exterior cladding is intended to shed most rain, while the rainscreen assembly provides a path for incidental water to drain and residual moisture to dry. The project’s WRB, flashing, cavity, and termination details remain critical parts of that strategy.
How does rainscreen subframing affect moisture management?
Subframing establishes the attachment plane and influences the space available for insulation, drainage, and ventilation. Bracket depth, rail arrangement, insulation interfaces, and attachment locations should reflect the requirements of the wall assembly.
Does aFrame replace the project’s air or water barrier?
No. aFrame is a thermally broken rainscreen subframing system, not an air or water barrier. It is intended to be selected and installed alongside the project’s substrate, insulation, control layers, cavity requirements, and cladding system.
What project information helps aPlank provide product guidance?
Useful information includes the wall substrate, insulation thickness, required system depth, cladding profile and orientation, loading conditions, opening conditions, and relevant transition details. These inputs help aPlank identify suitable product and aFrame options and determine where profile customization may be useful.